 Get started with hale»studio
guide. After choosing either of those options the welcome page is
replaced with the hale»studio workbench. You can also close the
welcome page manually.
When you start hale»studio the first time, it will present you with
the First steps welcome page. It offers you to load an existing
project or to continue with the
 Get started with hale»studio
guide. After choosing either of those options the welcome page is
replaced with the hale»studio workbench. You can also close the
welcome page manually.
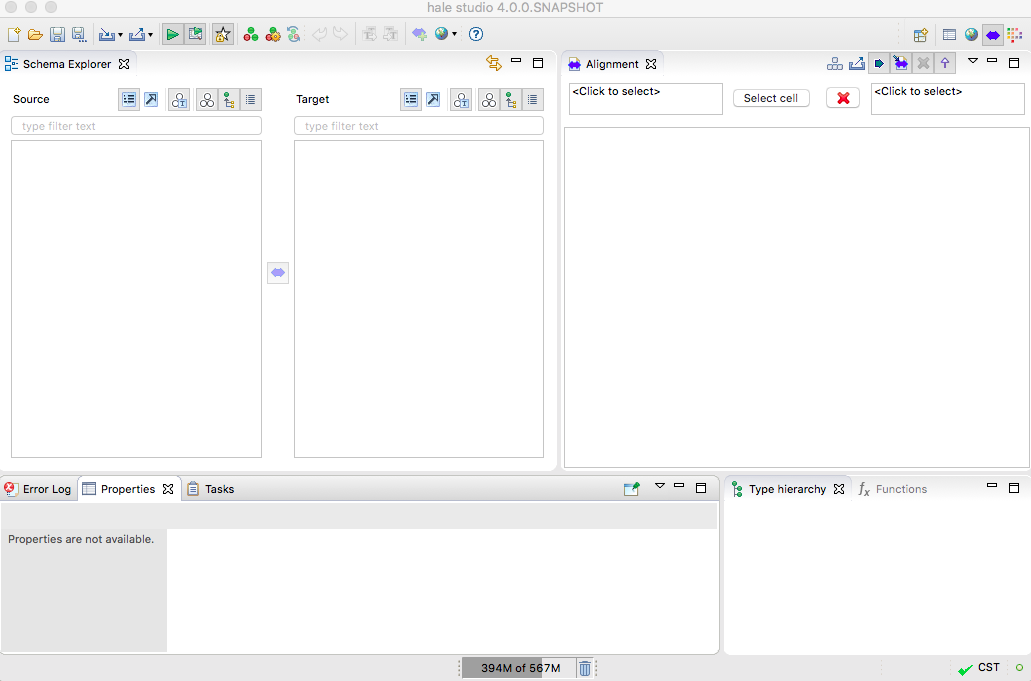
The workbench consists of
A perspective is a group of views in the workbench window. One or more perspectives can exist in a single workbench window. Each perspective contains one or more views. You can customize a perspective by adding or removing views, the state will be saved when the application is closed, and restored on startup. To show a view not yet available in the perspective, use the Window → Show view menu. To switch between perspectives, use the perspective bar, which is located in the top right corner of the application, next to the application tool bar.
A view is a visual component within the workbench. It is typically used to represent a certain aspect of the current project, displaying information and possibly also allowing to manipulate it.
In the image below, the Default perspective is the current perspective, and the Schema Explorer view is active.

The active view may provide a selection for the application, which is used as the context for commands (e.g. the Delete command if supported for the selected objects) or for displaying further information on the selected objects in another view (e.g. the Properties view).
Each of the views can be resized by grabbing its border and then dragging the mouse cursor. Furthermore, every view can be maximized by double clicking on the view title or by clicking the window icon in the right upper corner of the view. To set a view back to normal, you can again double-click on its tab or click on the icon displaying multiple windows. It is also possible to rearrange views. Just click on the view title and drag the mouse cursor to the desired position in the workbench. You will see that it is possible to stack views over each other, but also to arrange them next to each other.
When you find a view configuration that you like particularly well, you can save that configuration as a custom perspective. Again, go to the Window menu, pick Save Perspective as, and enter the name under which you want to store your perspective. The perspective's name will now appear in the upper right corner to indicate it is active and stored.